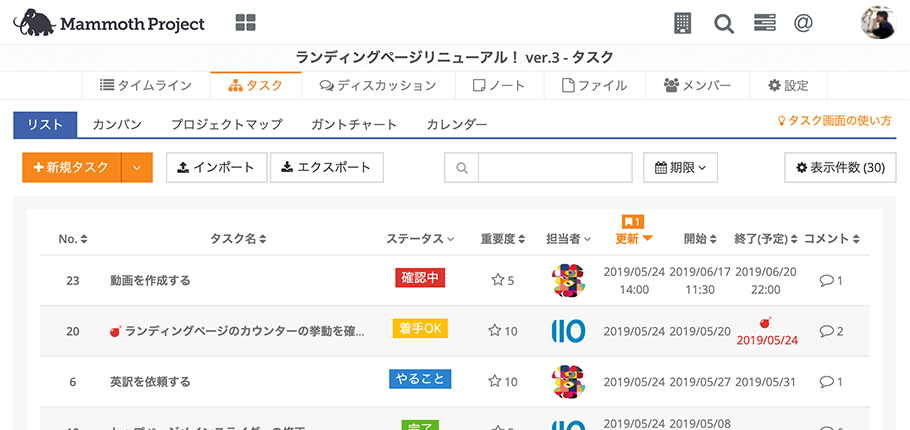
Determine Tasks
When you have decided to carry out a project, figure out what tasks are required. The task list is predominantly used for this. It can be rough at the beginning since information can be changed later.
The functions of the Mammoth Project have been designed in-line with the most ideal way to progress through projects.
The simplicity of all of the functions means that anybody can use them with ease.
Determine what tasks and output are required to achieve the goal of the project once the project has started.
Thinking about what considerations need to be made while the project is under consideration will help it to progress smoothly.
The secret to determining tasks is to make sure they can be completed by one assigned person and
to clarify what the output (deliverables) will be.
While there may be a lot to be confirmed at the beginning, there is no problem with roughly dividing up the tasks.
Split up tasks, and allocate deadlines and assigned people when the project progresses and the workload becomes more clear.
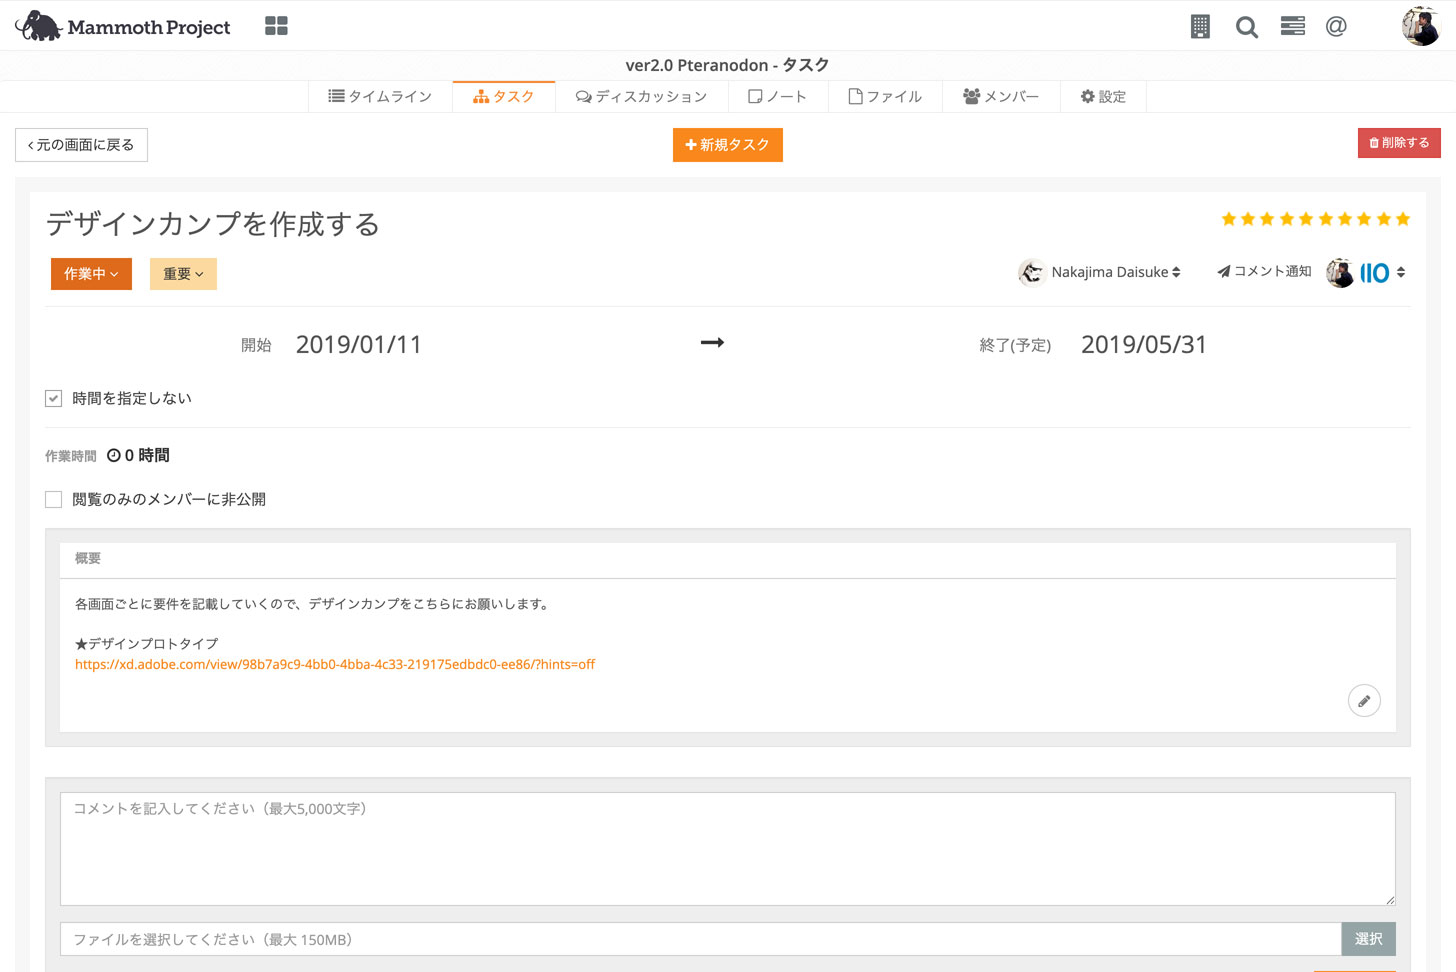
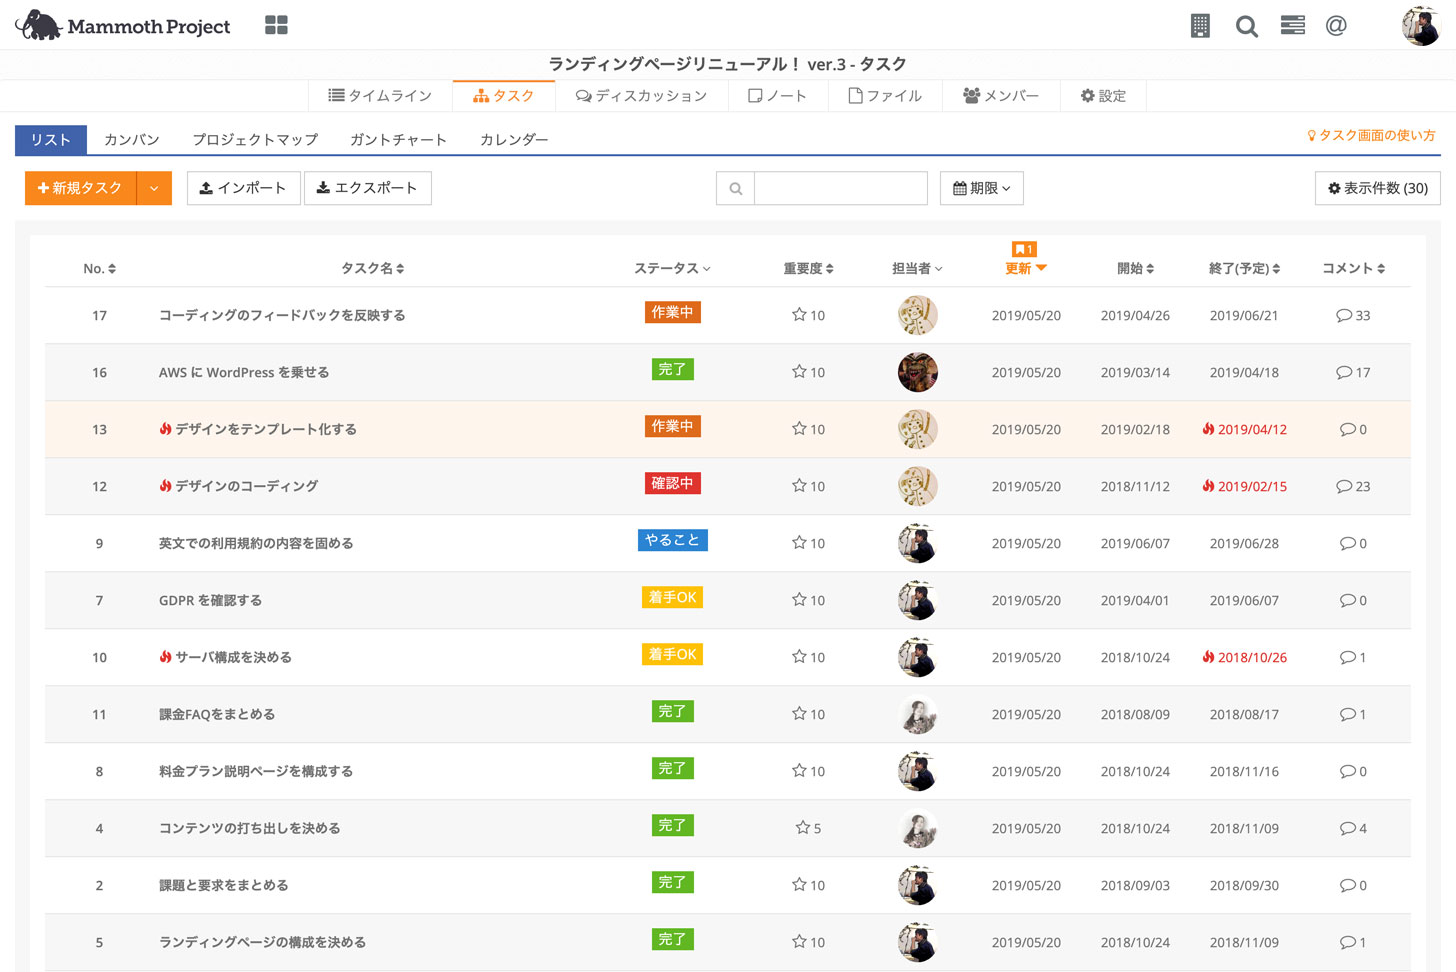
Information on assigned people is required to be posted on the Task Details screen when the determination of tasks has advanced to a certain extent.
Reporting is very simple when the person, assigned to a task, posts their progress, problems, and output on this screen.
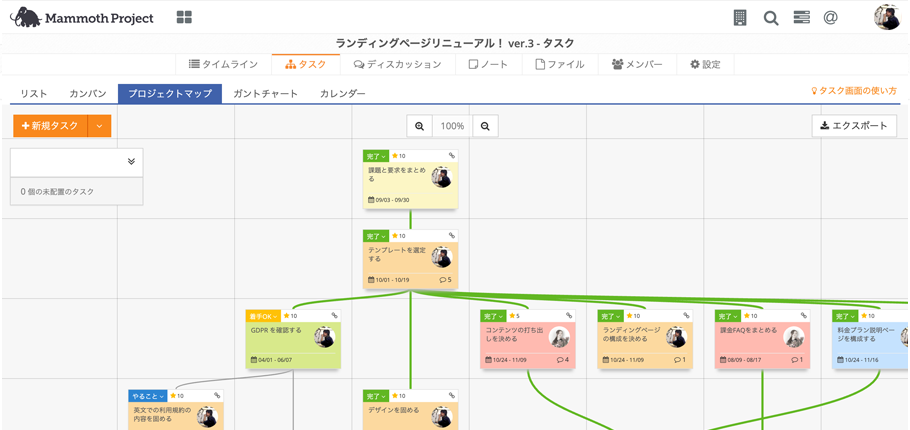
When you have determined what tasks need to be carried out to a certain extent, build the tasks using the Project Map.
Those involved in the project tend to be concerned when projects first start as it can be difficult to see how it will progress.
Help people start on tasks with peace of mind by sharing the overall project layout ahead of time.
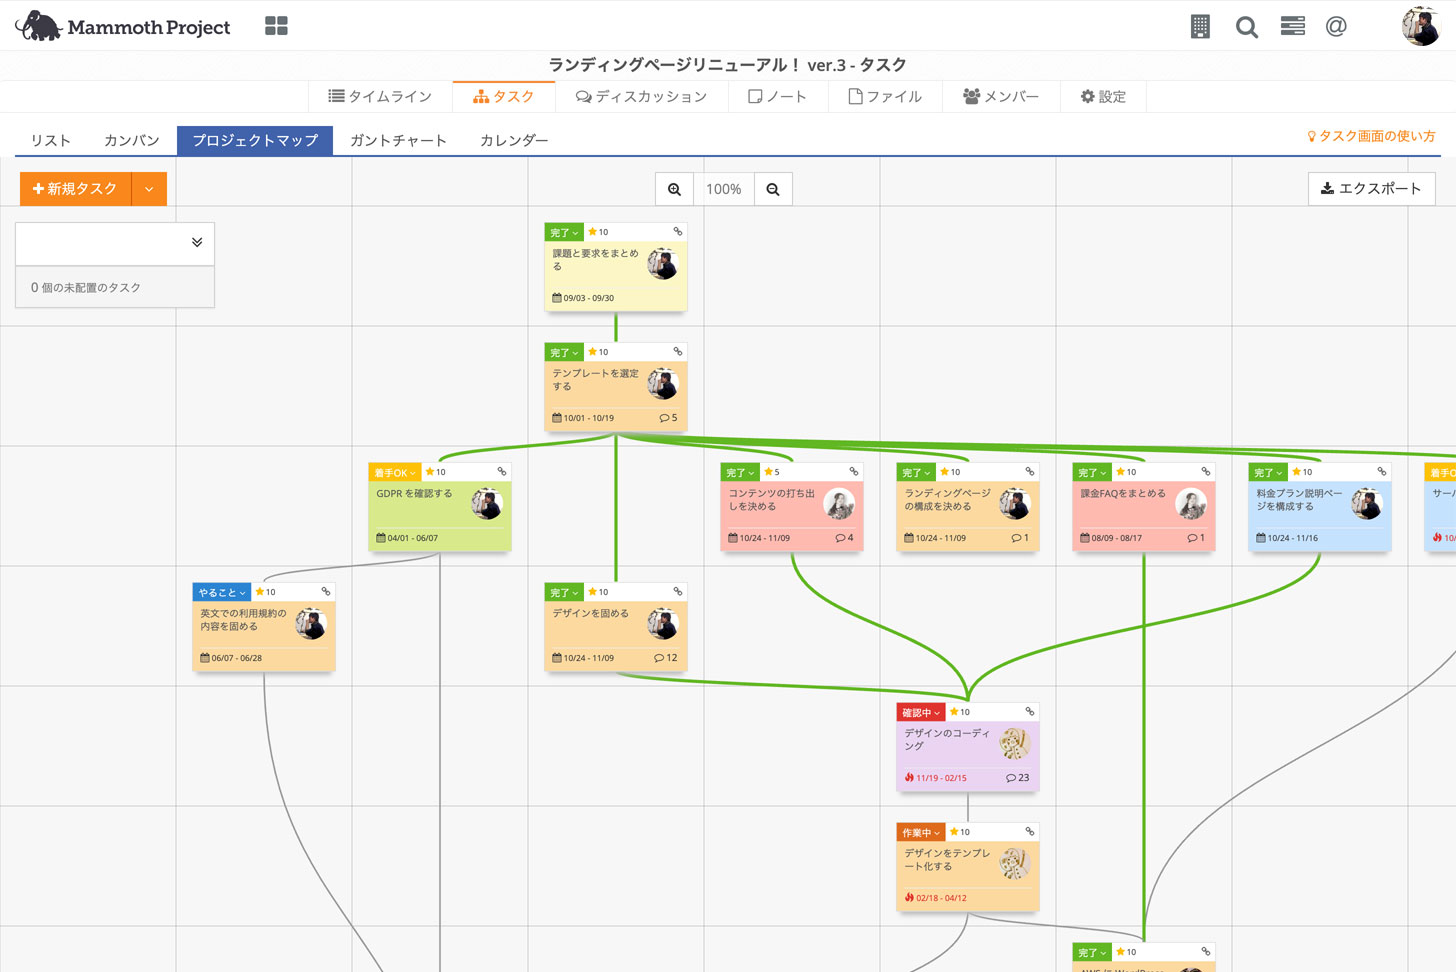
It is important to share the Project Map with members and other people involved as soon as possible, once it has been created in order, to see if any important tasks have been overlooked.
When you’re running short on budget and time you might find yourself saying, “Oh, We needed to do that! But it’s too late to fit it in now!”
Use and share the Project Map to avoid such situations.
If a new task appears while the project is in progress, check the general workflow to make smooth adjustments.
Once you have shared the general flow of tasks, it is important to keep track of progress when members start their work.
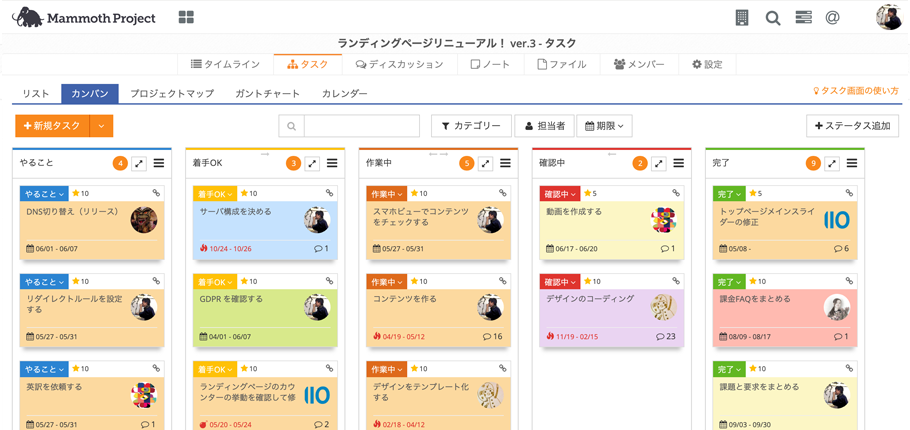
You can conveniently check the progress of tasks, the status, or the individual progress of each assigned member by using the Kanban board.
The status of tasks can be added on this screen.
Members can report the progress of their tasks on the task details screen and leaders can then move swiftly to resolve any problems that arise, improving the efficiency of the team.
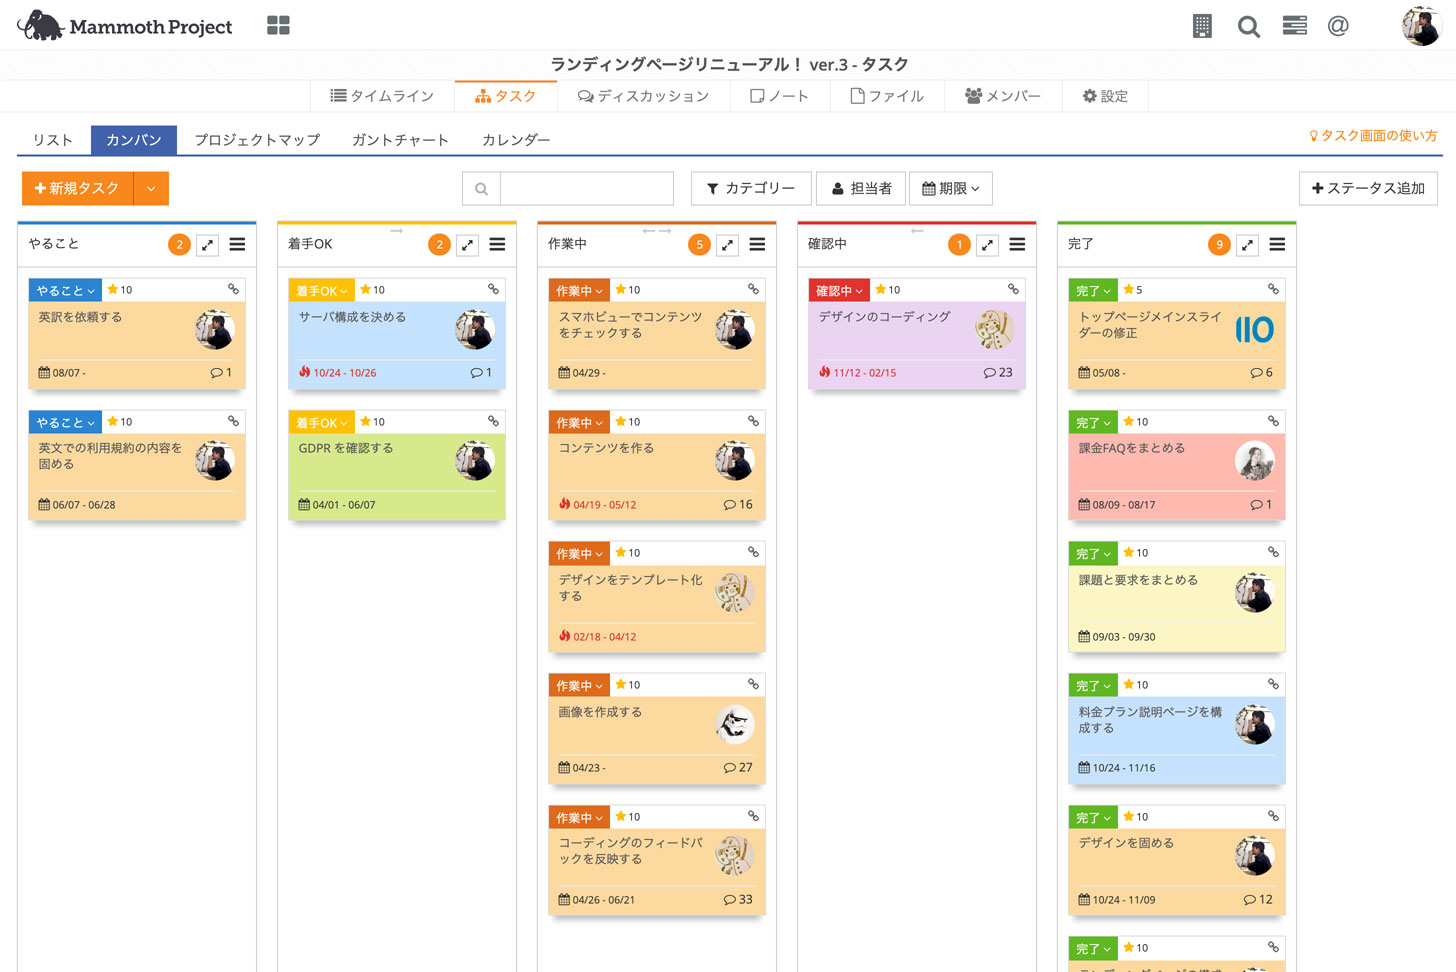
It is also effective for arranging 10-15 minute morning meetings for busy projects such as system development.
Use Zoom or another online meeting tool to conduct meetings with remote members and display the task board to all participants to keep the whole team on the same page.
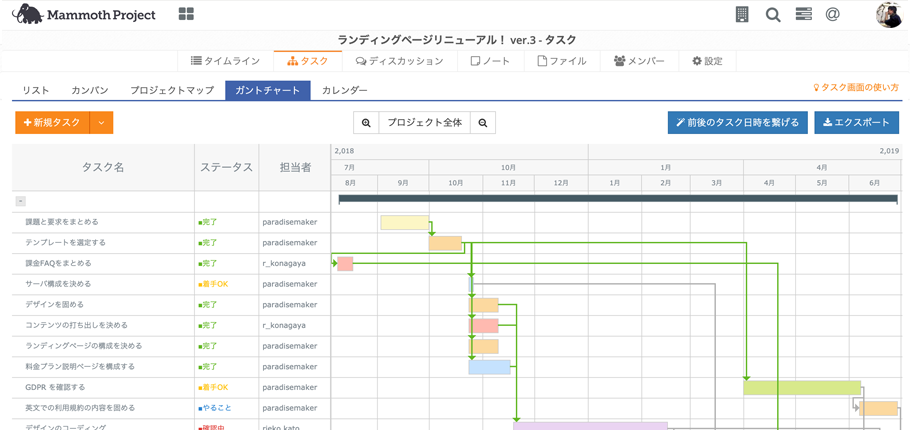
As the project enters its final stages, use the Gantt Chart or calendar to adjust and meet final goals, such as project release, on schedule.
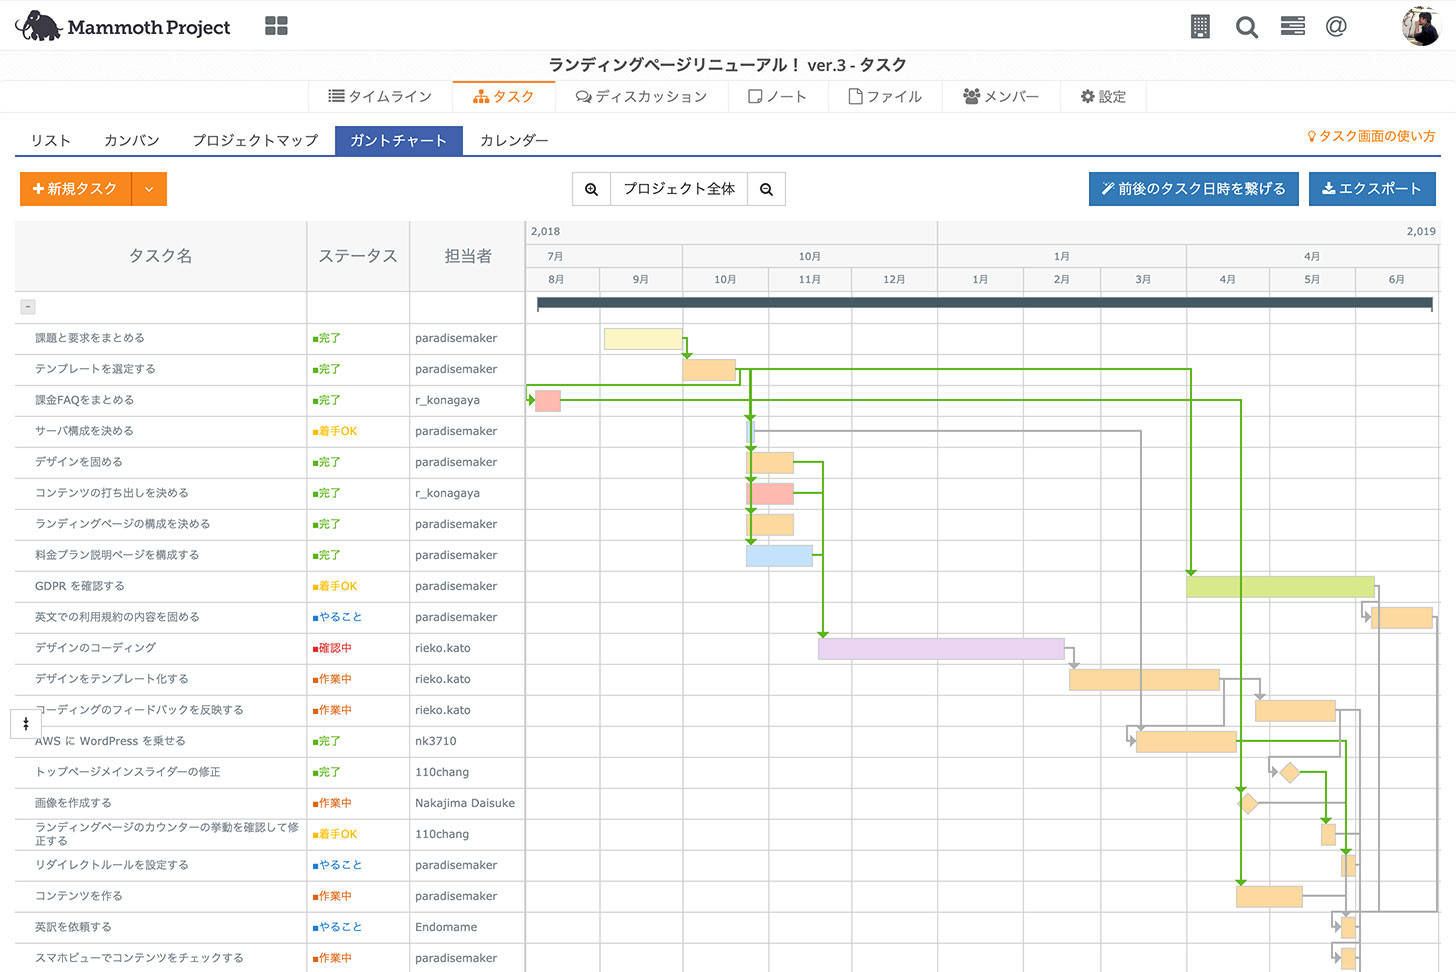
It is important to identify and share points of compromise within the team and project at meetings, such as when a task needs to be finished in order to stay on schedule for a release date.
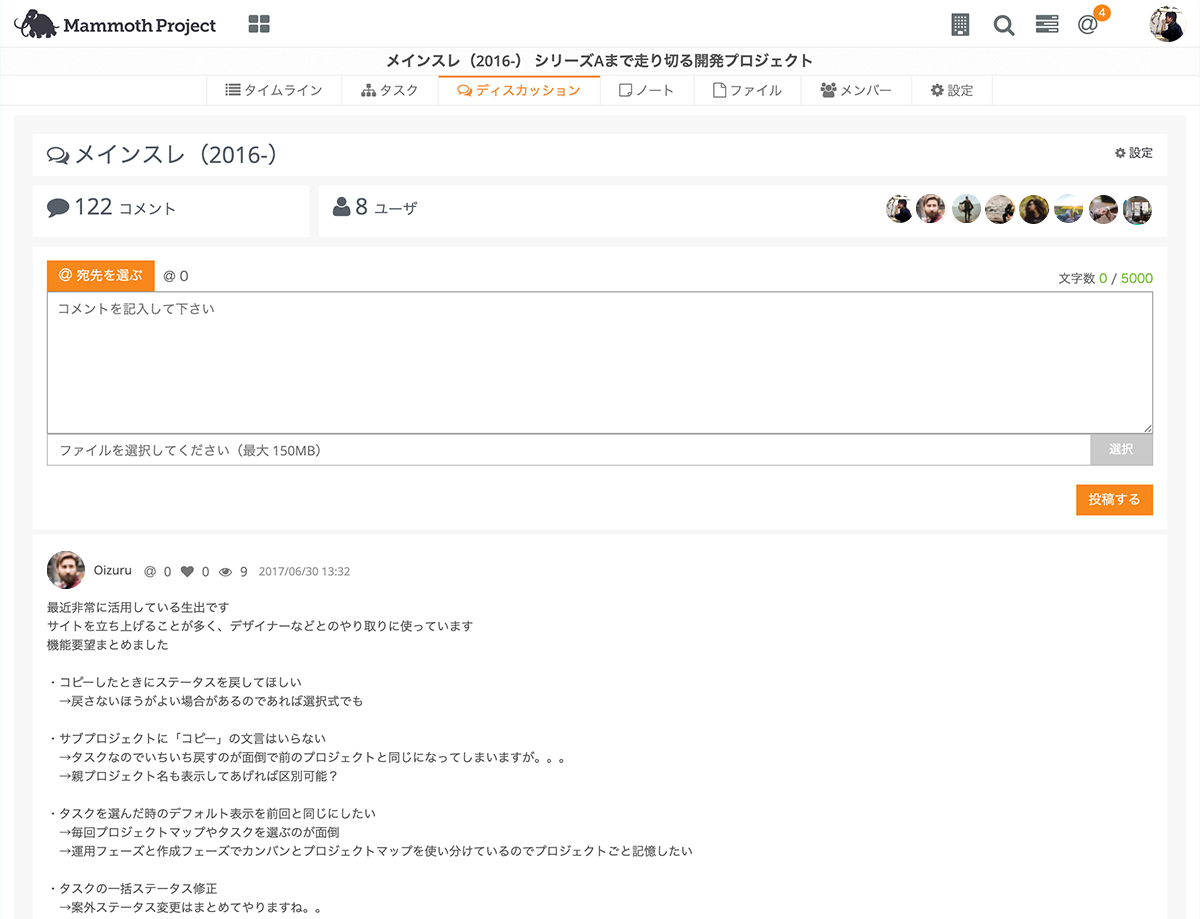
It is important to effectively share information outside of tasks with the team and manage members in projects.
The discussions function is useful for sharing meeting minutes and other items with your entire team.
Unlike emails that are sometimes ignored, or phone calls and chat messages that may disrupt the work of members, this can be used to effectively share information.
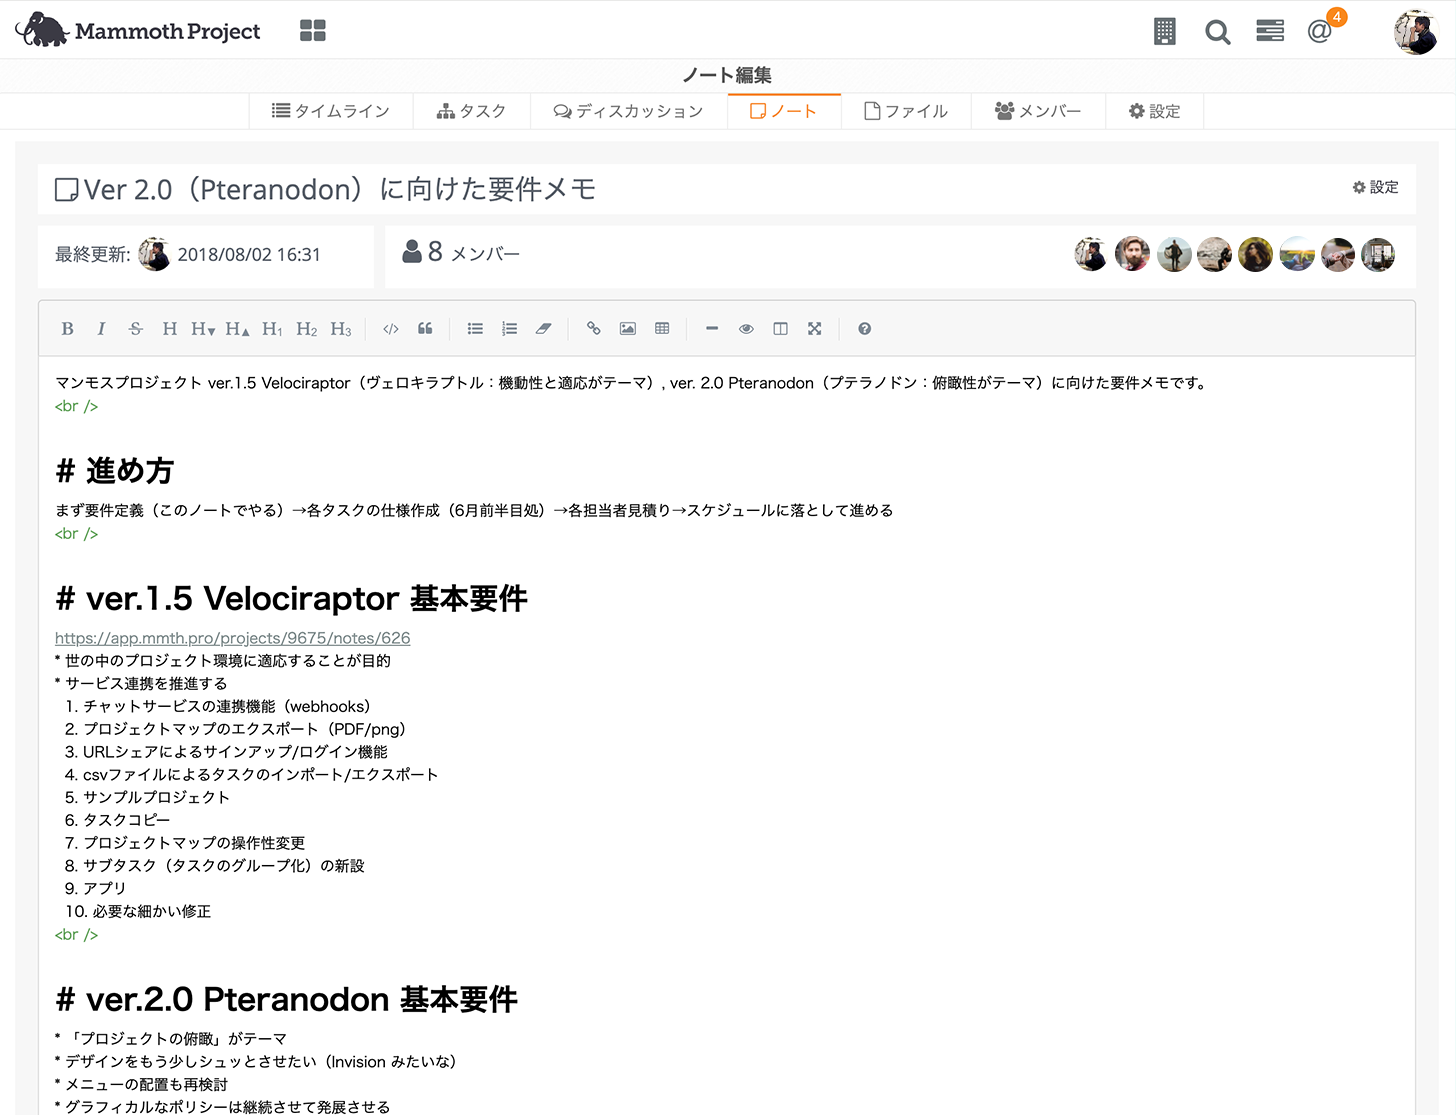
Frequently referenced materials, requirement definition materials gathered through viewing the project, proposals and other information are handy to keep stored in the notes.
“Where did that piece of information go?” It takes away the hassle of looking for information and prevents careless misses such as mistaken file versions.
You don’t need to remember any writing styles like with Wiki, and it is easy to edit like a Word file.
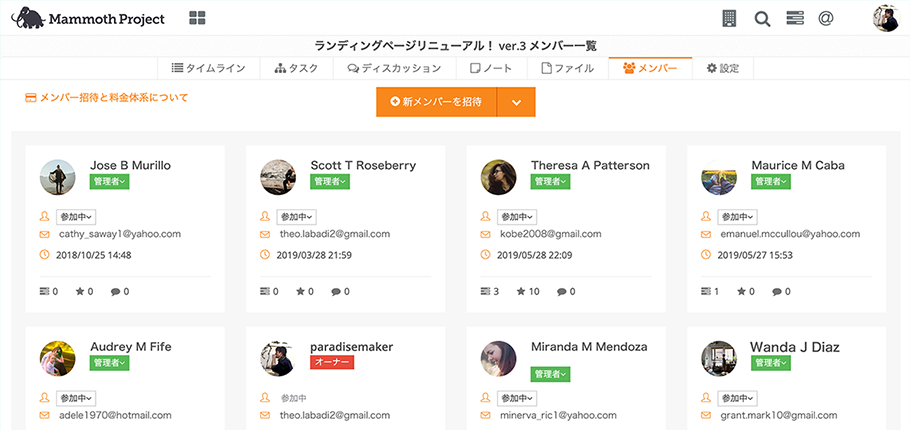
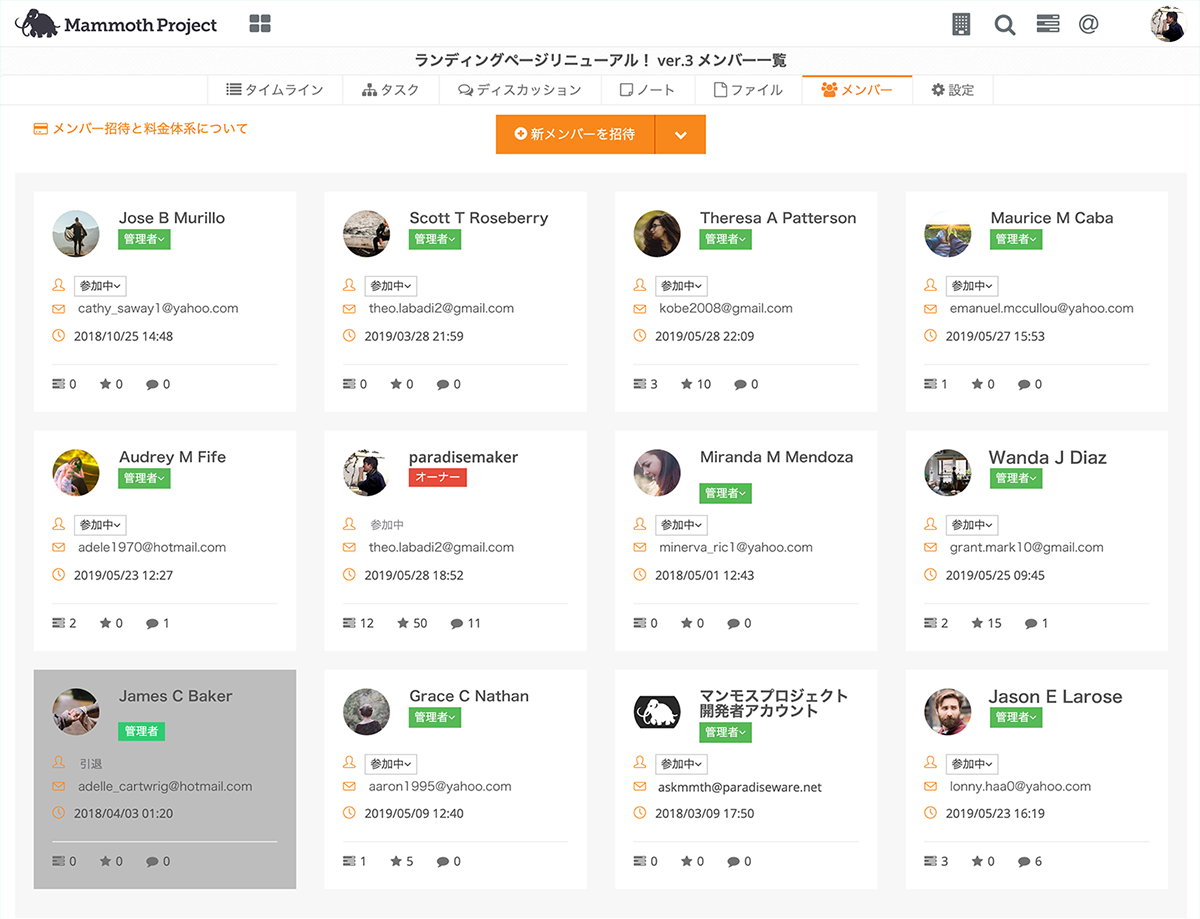
It is easy to manage members on the members’ list screen, even if some leave or join the project mid-way through.
The effort required for handover is kept to a minimum if you keep your information organized in the Mammoth Project.
New members can be quickly added to a project by sending an invitation to their email address.
Processing a leaving member is also simple using a pull-down option, making information management easy.
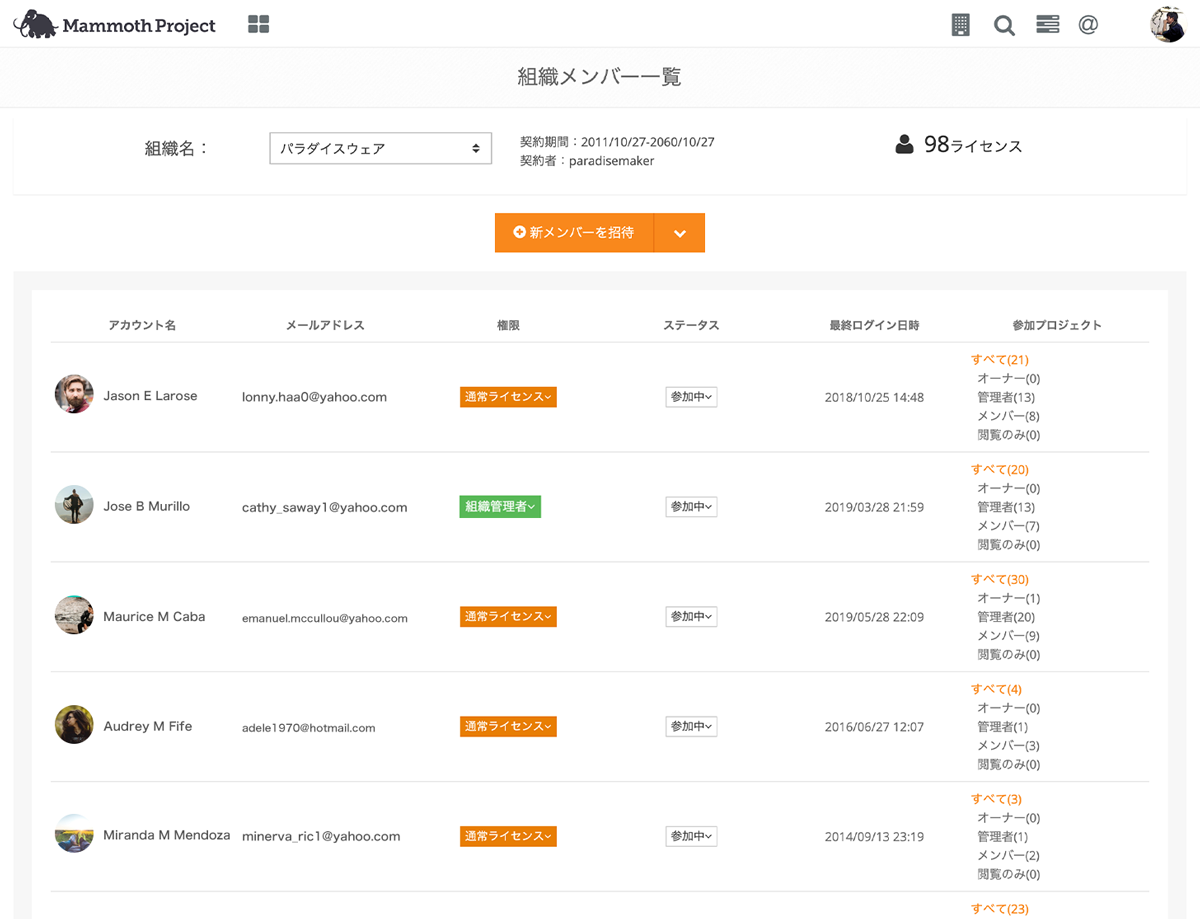
See here for details about different types of permissions.
Please apply for a corporate contract here if you wish to manage licenses as a company.
Organizations with corporate contracts can manage permissions throughout the project.
See here for the types of permissions on the organization management screen.
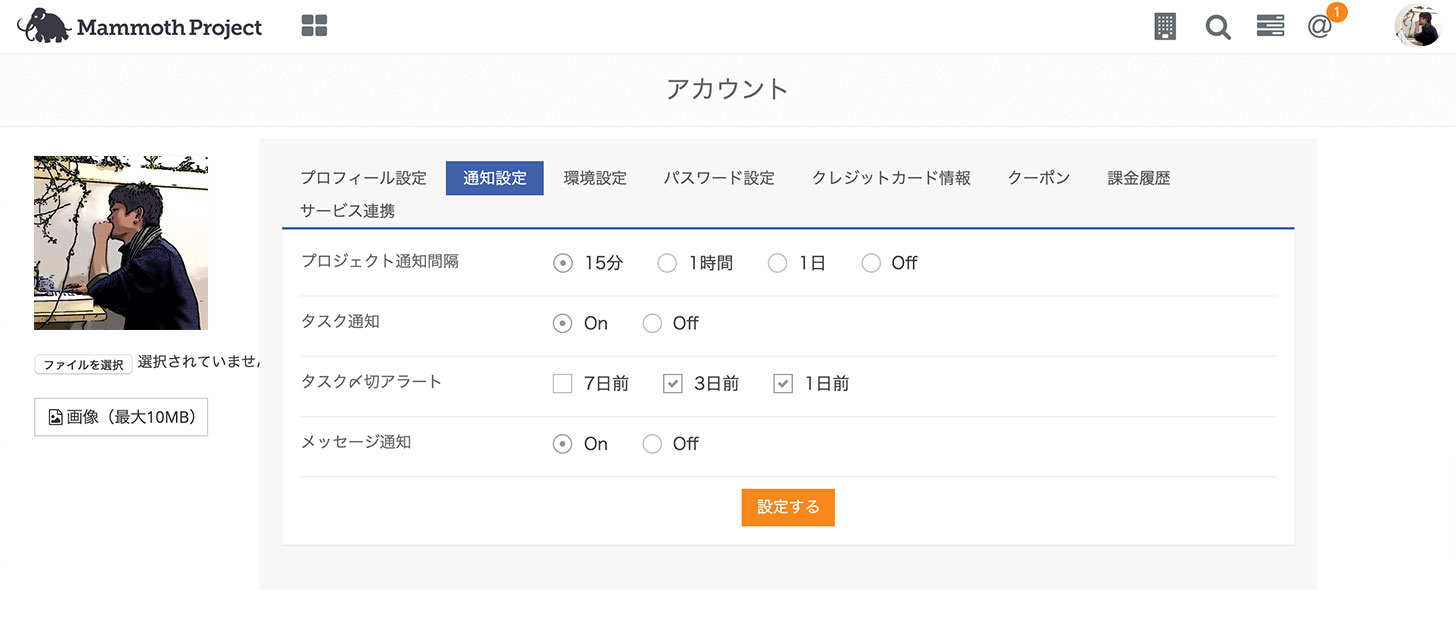
A variety of information, such as regarding settings or billing, can be viewed from the account settings screen on the top right of the menu.